While doing this project I have learnt how to do a few new things to further help me when I am using 3Ds Max.
One of the main things I learnt and also fun things was the wave modifier that I used to make the water move in my Tilbury Fort Animation, this tool allowed a more realistic scene for the Thames.
I also found out while messing about with some tools and options there are pre made models that can be imported from the C:Drive of the University, even though these models are very useful I decided not to use any in my models as I felt that using pre-made models would remove some of the creativity of my project so decided againt this but would be very useful in the future.
Also using camras again for the second time was another challenge trying to find the right camra, the angles and speed to move at was always a challenge but an enjoyable one at that.
Thursday, December 9, 2010
Wednesday, December 8, 2010
VUE Cinema Animation
For the Animation of VUE Cinema I used a Free Target camra.
Heres a quick render of my camra:-


Heres a quick render of my camra:-


VUE Cinema
For the next part of the scene for Lakeside I had to model VUE Cinema which is situated outside of the main Lakeside building, this was going to made as one render for my lakeside scene, but after importing it into my Lakeside model the computer began to struggle with both models, after a few minutes of trying to make them work together I decided to make a completely separate render.
To begin with the making of the VUE Cinema I started with a simple block and hollowed it out and cut the top and bottom, this would make up the wall's of my cinema were everything will be put inside.
For the material I used a simple white colour around the main building with a black strip around the bottom, I also applied a Dent modifier with the options "chip" and "Fractal" applied.
Here's a render of the outside wall:-
 Also using the same design as I used on my Lakeside model made the entrance were my doors would be placed.
I then modeled the roof and floor for the cinema, for the roof and floor I made a simple plane and applied the same white material as the walls, for the floor I used another plane but applied a carpeted material found on the universities C:Drive.
Here it the renders of the roof and floor:-
 Ceiling
 Floor
Floor
For the next part of my model I created the sign's that are above the entrance of VUE Cinema, one being the large sign that has the iconic orange VUE on it and also some custom text I applied.
Here are the renders of the the signs:-


Once this was done I had to add the glass doors onto the cinema, this was done in the same way as my Lakeside model by just adding some simple planes and applying the glass material to them both to create sliding doors.
Here's the render of the door's:-

Once I was happy with the outside areas of my cinema it was time to start modeling the inside, this part of the model only took me a short while but also was one of the major reason for the amount of lag time in the model.
To begin with I started by modeling the chairs that I would put into the cinema, as I was trying to copy VUE Cinema I added there armchairs that are widely popular with all VUE cinema's, I added a simple brown colour to the chairs with a small bump map, but because of the size of the chairs the bump couldn't be seen unless a very close up render was made.
Once I was happy with the shape I turbo smoothed the model and copied it multiple times to create the cinema chairs which would fit on the cinema stairs.
Here are the renders of a single chair and the chairs copied:-


For the chairs to fit in the cinema I had to create the steps for the chairs, these were made from simple blocks and just copied multiple times while moving up a little bit each time, I then attached the vertices's to each other to make a solid shape, I then copied each section across to make the stands bigger length ways and attached them again.
I applied the same carpet material to the steps as I did to the floor as almost all VUE cinemas are carpeted.
Here's a render of my steps:-

I then had to make the stands for my steps, these were made from simple blocks, converted to editable poly and then using the vertex tool just morphed them into a nice shape, the stands that run the edge of the steps rise gently to copy the way the stairs rise.
Here's a render of the stand:-

When I was happy with the main seating area I began to think about what I could put into my cinema screen, as again blogspot wouldn't allow videos to be uploaded I cant show you exactly what I did, but in short I created a short slide show in windows movie maker, converted it to a Avi. File and then imported it as a material into 3Ds max, I then was able to make the slide show work after a few hours of tinkering around with the options.
The slide show was composed of pictures my group had taken for references for our models and gave a nice addition to the final video.
I will add the pictures we used at the end of my blog.
For the last Addition to my cinema I thought the video was a bit boring and bland so I decided to add some posters to the wall as you enter the cinema of three films that are popular with everyone, I chose the poster for Avatar, The Hangover and Saw VI, these were simply done by adding another plane and applying each picture taken from the Internet and then UVW unwrapping the pictures to fit the plane.
Here is a render of the poster's:-

For the final touch to my cinema render I added the pavement and sky to the scene, the pavement was made by adding another plane and applying a grey material with the dent map applied with default settings and just scaling the dent down, for the sky I used the same sky as I used for all my other models.
Here are the renders of the floor and sky:-


To begin with the making of the VUE Cinema I started with a simple block and hollowed it out and cut the top and bottom, this would make up the wall's of my cinema were everything will be put inside.
For the material I used a simple white colour around the main building with a black strip around the bottom, I also applied a Dent modifier with the options "chip" and "Fractal" applied.
Here's a render of the outside wall:-
 Also using the same design as I used on my Lakeside model made the entrance were my doors would be placed.
I then modeled the roof and floor for the cinema, for the roof and floor I made a simple plane and applied the same white material as the walls, for the floor I used another plane but applied a carpeted material found on the universities C:Drive.
Here it the renders of the roof and floor:-
 Ceiling
 Floor
FloorFor the next part of my model I created the sign's that are above the entrance of VUE Cinema, one being the large sign that has the iconic orange VUE on it and also some custom text I applied.
Here are the renders of the the signs:-


Once this was done I had to add the glass doors onto the cinema, this was done in the same way as my Lakeside model by just adding some simple planes and applying the glass material to them both to create sliding doors.
Here's the render of the door's:-

Once I was happy with the outside areas of my cinema it was time to start modeling the inside, this part of the model only took me a short while but also was one of the major reason for the amount of lag time in the model.
To begin with I started by modeling the chairs that I would put into the cinema, as I was trying to copy VUE Cinema I added there armchairs that are widely popular with all VUE cinema's, I added a simple brown colour to the chairs with a small bump map, but because of the size of the chairs the bump couldn't be seen unless a very close up render was made.
Once I was happy with the shape I turbo smoothed the model and copied it multiple times to create the cinema chairs which would fit on the cinema stairs.
Here are the renders of a single chair and the chairs copied:-


For the chairs to fit in the cinema I had to create the steps for the chairs, these were made from simple blocks and just copied multiple times while moving up a little bit each time, I then attached the vertices's to each other to make a solid shape, I then copied each section across to make the stands bigger length ways and attached them again.
I applied the same carpet material to the steps as I did to the floor as almost all VUE cinemas are carpeted.
Here's a render of my steps:-

I then had to make the stands for my steps, these were made from simple blocks, converted to editable poly and then using the vertex tool just morphed them into a nice shape, the stands that run the edge of the steps rise gently to copy the way the stairs rise.
Here's a render of the stand:-

When I was happy with the main seating area I began to think about what I could put into my cinema screen, as again blogspot wouldn't allow videos to be uploaded I cant show you exactly what I did, but in short I created a short slide show in windows movie maker, converted it to a Avi. File and then imported it as a material into 3Ds max, I then was able to make the slide show work after a few hours of tinkering around with the options.
The slide show was composed of pictures my group had taken for references for our models and gave a nice addition to the final video.
I will add the pictures we used at the end of my blog.
For the last Addition to my cinema I thought the video was a bit boring and bland so I decided to add some posters to the wall as you enter the cinema of three films that are popular with everyone, I chose the poster for Avatar, The Hangover and Saw VI, these were simply done by adding another plane and applying each picture taken from the Internet and then UVW unwrapping the pictures to fit the plane.
Here is a render of the poster's:-

For the final touch to my cinema render I added the pavement and sky to the scene, the pavement was made by adding another plane and applying a grey material with the dent map applied with default settings and just scaling the dent down, for the sky I used the same sky as I used for all my other models.
Here are the renders of the floor and sky:-


Monday, December 6, 2010
Lakeside animation
As said previously Blogspot would not allow a video to be posted up but here is the render of the camra used to create my final animation of Lakeside:-


Final Render
Once I was happy with all my modelling of Lakeside I could begin animating
Heres the final render with the same sky used on the Tiblury Fort model:-

Heres the final render with the same sky used on the Tiblury Fort model:-

Inside of Lakeside
Now I'm happy with the outside of my Lakeside model it was time to start thinking about this inside of the model, after a group discussion I decided that the best way to show lakeside was to have lines of shops on either side to show the diversity that lakeside can offer.
To begin with I started by creating the layout for my shop, this was done by creating a simple box and then extruding polygons back into the shape to create the entrance for shop, then taking a picture from google dropped the picture onto a plane via material editor and to show what the shop looks like inside.
Here's a render of the shops:-

I then copied this layout to create more shops and taking different pictures from google I made a line of shops, I also researched what shops where on the bottom floor of Lakeside.

I then decided to make an information desk with a sign pointing to more shops and the VUE cinema, this was done by using the C-Ext model which create pre-made C shaped blocks, using two of these made up the desk and back of the info centre.
I then added the word INFORMATION onto the back of the Desk and added two i onto the glass back on the desk.
Below is a render of the info desk and the sign:-


I then made the exit sign for lakeside, this was done by using the same method as I did for the main entrance for the text LAKESIDE.
Below are the renders of the exit signs:-

I also decided to create a small toy stand, the reason I did this, while on a visit to lakeside, outside the Disney shop there was a toy stand selling the little aliens from toy story, I decided to make the stand and the aliens with some spare time I had while waiting for a render to finish.
Below is the alien and toy stand created from basic shapes to get my desired model:-


Finally I had to add the roof to lakeside, this was done by simply creating a plane and applying the same beige material used for the walls and placing it on top of the opening left by the walls for the roof, I then copied this 3 times to cove the entire roof.
I then copied and rotated each one and applied a white material the same for the walls inside of lakeside so the roof rendered on both sides without going see-through.
Heres a render of the roof:-

Lakeside Walls
The next part of my model was to create the walls for Lakeside, to do this I started with a basic block, I converted this to an editable poly and using the vertex tool move the wall into a shape the slightly resembled an L shape, I then copied this around to make 6 copies to give the shape I wanted for the layout of my Lakeside model.
I then had to make a exit for my model, this was done by again creating a block and converting to an editable poly, then by using the vertex tool I morphed the exits into a shape similar to a C.
I also cut out some polygons to make space for more glass doors to be placed in the exits.
I then applied a meterial to the walls, for the outside I made a beige material with a dent map applied and also used the same material for a orange strip that goes around the edge of the wall, I applied this material to the outside of the wall only, for the inside I applied a simple white material.
I also added the floor to the model using the same material and turning it grey.
Here is a render of the L and C shape parts of the wall:-


Here is a render of the walls attached and floor:-

Lakeside 3D model [Bottom half of Entrance]
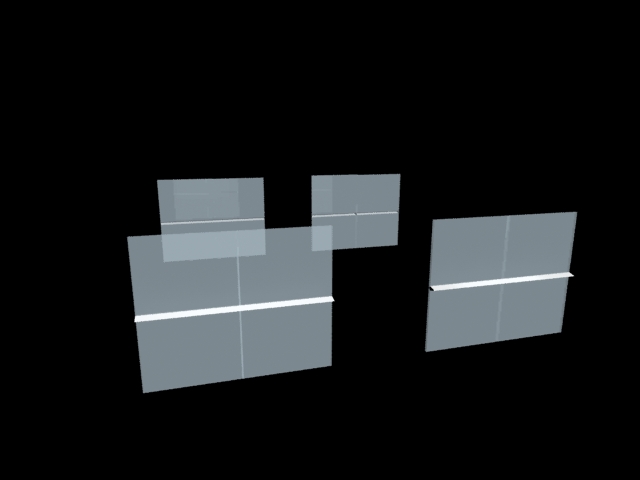
Now that I am happy with the top half of my Lakeside entrance I started to model the bottom half, which would have sliding glass doors as a way into lakeside which will be shown in the animation.
First I started with a basic block and began extruding out the bottom polygons to create an entrance and exit into Lakeside, I then created some glass windows using the same rule as I did for the top half of the entrance, I then deleted the polygons on the entrance and exit, these would be filled with glass doors.
When I rendered this part of the model I found the when I went inside of the entrance I could see out and it wouldnt render the material I had applied, to get around this I copied the model and scaled it down by 0.1, I then went to the modifier list and selected "Normal" this turned the copied model inside out which allowed a material to be shown when I went inside the model.
Here's a render of the Inside and outside version of the model:-


Here you can see on the left the model thats been turned inside out and on the right the orginal model.
After I was happy with this I then had to add the doors that would allow entrance into Lakeside, these were made from simple blocks that I made very thin, I applied the Glass material to these doors, I also added a handle to each door by grabbing a edge in the centre of the block and extruding it.
Here is the render of all of the doors in my model for the main entrance:-
Lakeside 3D model [Top half of Entrance]
Once I had finished the Tilbury Fort model, it was time to move onto my next model.
This was to be the Lakeside Shopping centre, at first I had planned to model the entire Lakeside area, but after a group discussion we decided that the time left and also the time it would take to render would take to long and be stretching the group to thin to reach the deadline, I then deiced to model the main entrance of the gate.
Below is a picture I am going to be using as reference for my Entrance:-

To start with I created a basic block for the Entrance, I then added 14 segments all around the block, this would allow me to create a the windows as shown in the picture above.
To start with I selected each individual edge and extruded them out to make the window frames for the main entrance, also using the chamfer tool I was able to create the thicker frames that go around the entrance and though the middle, these thicker frames were also extruded, this allowed the for the main window shape to be indented into the main body of the model.
I then selected each polygon in between the frames and applied a glass material that I had made and for the frames I just applied a white material, I did this on all four sides of the entrance.
Here is a render of the material applied:-

As you can see the glass material has a slight blue tinge to it, also as its glass it has to be see through, I was happy with this material and would use it for all the glass later in my model.
For the roof of the Lakeside entrance I extruded the top edges of the block out to create a small overhang and then went around selecting all the polygons on the top of the housing I then extruded up by three, I then hit the shrink tool to deselect the outside polygons and followed extruded up by three a few more times until I had a staggered pyramid shape, then selecting the centre polygons extruded upwards by 10 and then selected the last individual polygon to create a small spire on the top of the gate, I then went around using the same rule as before by selecting the edges and extruded to create the window frames and applying the materials.
I was pleased with the result of the roof and was happy That I had managed to do this only using one block.
Below is a render of the roof and top spire:-


For the next part of the main entrance I was to model the large arch at the top of the entrance and to put the glass that fits inside it into it, this was done by selected the polygons I was going to use to create the arch, I then extruded these outwards, I then began to manually move the selected polygon upwards and after some tinkering created a circular shape I was happy with, I then just selected these extruded polygons and copied them up and back to created a multi-layered arch as shown in the picture.
Here's a render of the arch I created:-

Once I was happy with the shape of the arch I next created the glass to fit inside it the arch, this was done by making a simple cylinder and using the create tool I created the lines for were the window frames would be to correspond with the glass below, I then followed the same as I did before for the main body and roof windows, I then just had to place it in the arch, after a few minutes tinkering around with the extrusion tool I got a good fit and was happy with the result.
Here is a render of the glass and the glass attached to the arch:-


Once I was happy with this part of my model, my next part of the model was to create the doorway overhang cover, this was done quite simply by selected the very bottom polygons and extruded out by 10, also I angled the extrusion to better suit the main picture I am using as a reference, I then selected the far edges and then four more mirroring each other, I then extruded these in both directions to create the frames for the windows, I applied the glass material to hangover, but for the frames I applied a dark blue and made them less see-through.
Here is some renders of the overhang:-


For the last part of the top half of my model I created the Lakeside sign that is on the main entrance to Lakeside shown on the reference picture.
To do this I first created a simple block for the background and applied the glass material to it, I changed the material by making the glass a dark blue colour and reducing the opacity to make it less see-through.
I then applied the Word LAKESIDE by using the text tool and simply dropping it in front of block that I made, I made the text 3D by turning it into an editable poly and extruding the letters out by 10, I then applied the same white material I used for the window frames.
Heres the render of the Background and text:-

Wednesday, December 1, 2010
Tilbury Fort Animation
For this project The group has to animate there models for the Visit Essex project.
To do this I added a camera to the scene which would allow me to record all the movements I made, this was a Free Target Camera, this type of camera uses a camera tool and a pointer tool which the camera will always look at, this camera allowed me to create my animation, but due to problems with Blogspot the video will not open.
I also added a omni light to the scene and lowered the intensity to cast a more shadowy scenery
Here are the pictures of the camra and Omni light used.


Tilbury Fort
I modelled Tilbury Fort and I am very pleased with the result and will move onto Lakeside asap.
Here is a brief outline of how I went about creating Tilbury Fort.
First we visited the fort and got some nice pictures of the brickwork that I would use in my model.
When I began modeling I found Tilbury Fort on Google Earth, I then cut the image out using the Snagit tool on the computers, I then applied this to a plane to use as a reference for my model.
This is the picture I used.

Using this picture as a reference on a plane in 3DS max i started to create the walls in the shape the fort is in, this was quite difficult as the fort is in a strange shape and using blocks to build the walls didn't line up very well and took allot of tinkering to get them into a decent position.
Here is my finished wall model with a brick material applied that was taken at the fort.

After the wall was created I could start on the surrounding countryside that makes up the forts moats.
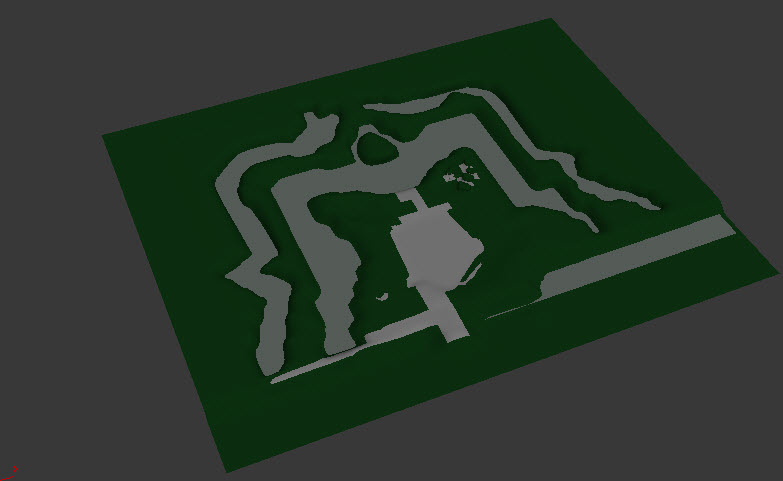
I did this by first creating a plane with lots of polygons so manipulation would be easy, Then using soft selection I dragged the vertices's so make up the same shape that surrounds the fort, still using the picture from before as a reference.
Here is a picture of the layout of the fort, in the picture you can see where the moats will be and the basic layout from the inside of the fort when the wall will be put it.
 Also in the picture the dip at the foreground is to be filled with the Thames.
I then had to make the water for the moat, this was done again by creating a plane and adding a material to the plane that would look like water with a small amount of reflection and giving it a blue tinge.
I also added a grassy green material to the land and filled in the concrete areas in grey that make up the internals of the fort.
Here is a picture of the material applied to the land and moat.


I then added the sea to the model, this was again a plane with the same material added as the moat but with a larger bump map applied (Would later add wave modifier when video rendering started)
Here is a render of the sea.

After I had finished tinkering with the material for the sea I began work on the Tilbury fort gate, here is a picture I took on the visit to Tilbury Fort and next to it my 3D model.


Next I added the two bridges that are attach the two moats together using a simple block with a wood material applied that I took a picture of while at the fort, I also added very basic Gun Emplacement models on the ridge that overlooks the Thames, there were created using two cylinders, one to make the turret and the other for the turret housing, also for the concrete emplacement was a sphere that I squashed down to make a semi circular shape.
Below is a picture of the bridges and the guns.


I then added some basic buildings that are inside the Fort using blocks and pyramids, below is the picture of these buildings.

I then added the back gatehouse to the fort, this was made using a large block and deleting the centre to create a gangway, I then added a pyramid for the roof, I added the same brick material used on the walls, for the roof I added a roof tile material I found on google, I also added the gate in, the material for the gate was cut from a picture I took at the fort using Photoshop.
Here is a picture of the back gatehouse and the gate.


I am very happy with my model, here is a final render of all the materials applied.

Here is a brief outline of how I went about creating Tilbury Fort.
First we visited the fort and got some nice pictures of the brickwork that I would use in my model.
When I began modeling I found Tilbury Fort on Google Earth, I then cut the image out using the Snagit tool on the computers, I then applied this to a plane to use as a reference for my model.
This is the picture I used.

Using this picture as a reference on a plane in 3DS max i started to create the walls in the shape the fort is in, this was quite difficult as the fort is in a strange shape and using blocks to build the walls didn't line up very well and took allot of tinkering to get them into a decent position.
Here is my finished wall model with a brick material applied that was taken at the fort.

After the wall was created I could start on the surrounding countryside that makes up the forts moats.
I did this by first creating a plane with lots of polygons so manipulation would be easy, Then using soft selection I dragged the vertices's so make up the same shape that surrounds the fort, still using the picture from before as a reference.
Here is a picture of the layout of the fort, in the picture you can see where the moats will be and the basic layout from the inside of the fort when the wall will be put it.
 Also in the picture the dip at the foreground is to be filled with the Thames.
I then had to make the water for the moat, this was done again by creating a plane and adding a material to the plane that would look like water with a small amount of reflection and giving it a blue tinge.
I also added a grassy green material to the land and filled in the concrete areas in grey that make up the internals of the fort.
Here is a picture of the material applied to the land and moat.

I then added the sea to the model, this was again a plane with the same material added as the moat but with a larger bump map applied (Would later add wave modifier when video rendering started)
Here is a render of the sea.

After I had finished tinkering with the material for the sea I began work on the Tilbury fort gate, here is a picture I took on the visit to Tilbury Fort and next to it my 3D model.


Next I added the two bridges that are attach the two moats together using a simple block with a wood material applied that I took a picture of while at the fort, I also added very basic Gun Emplacement models on the ridge that overlooks the Thames, there were created using two cylinders, one to make the turret and the other for the turret housing, also for the concrete emplacement was a sphere that I squashed down to make a semi circular shape.
Below is a picture of the bridges and the guns.


I then added some basic buildings that are inside the Fort using blocks and pyramids, below is the picture of these buildings.

I then added the back gatehouse to the fort, this was made using a large block and deleting the centre to create a gangway, I then added a pyramid for the roof, I added the same brick material used on the walls, for the roof I added a roof tile material I found on google, I also added the gate in, the material for the gate was cut from a picture I took at the fort using Photoshop.
Here is a picture of the back gatehouse and the gate.


I am very happy with my model, here is a final render of all the materials applied.

Subscribe to:
Comments (Atom)