Here is a brief outline of how I went about creating Tilbury Fort.
First we visited the fort and got some nice pictures of the brickwork that I would use in my model.
When I began modeling I found Tilbury Fort on Google Earth, I then cut the image out using the Snagit tool on the computers, I then applied this to a plane to use as a reference for my model.
This is the picture I used.

Using this picture as a reference on a plane in 3DS max i started to create the walls in the shape the fort is in, this was quite difficult as the fort is in a strange shape and using blocks to build the walls didn't line up very well and took allot of tinkering to get them into a decent position.
Here is my finished wall model with a brick material applied that was taken at the fort.

After the wall was created I could start on the surrounding countryside that makes up the forts moats.
I did this by first creating a plane with lots of polygons so manipulation would be easy, Then using soft selection I dragged the vertices's so make up the same shape that surrounds the fort, still using the picture from before as a reference.
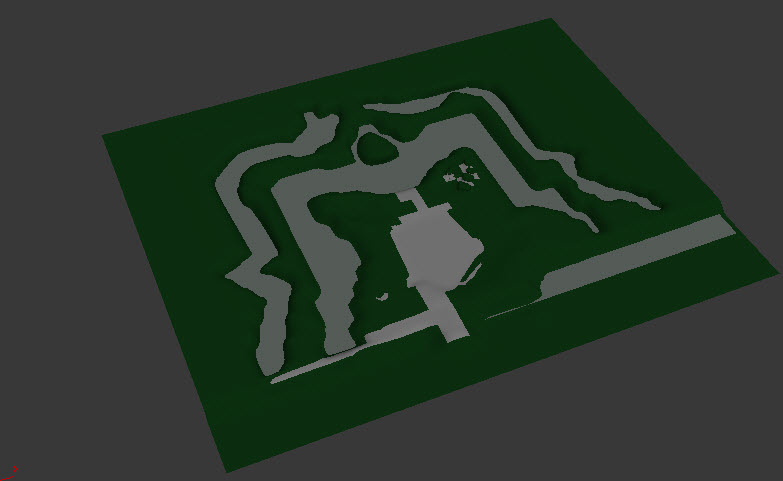
Here is a picture of the layout of the fort, in the picture you can see where the moats will be and the basic layout from the inside of the fort when the wall will be put it.
 Also in the picture the dip at the foreground is to be filled with the Thames.
I then had to make the water for the moat, this was done again by creating a plane and adding a material to the plane that would look like water with a small amount of reflection and giving it a blue tinge.
I also added a grassy green material to the land and filled in the concrete areas in grey that make up the internals of the fort.
Here is a picture of the material applied to the land and moat.

I then added the sea to the model, this was again a plane with the same material added as the moat but with a larger bump map applied (Would later add wave modifier when video rendering started)
Here is a render of the sea.

After I had finished tinkering with the material for the sea I began work on the Tilbury fort gate, here is a picture I took on the visit to Tilbury Fort and next to it my 3D model.


Next I added the two bridges that are attach the two moats together using a simple block with a wood material applied that I took a picture of while at the fort, I also added very basic Gun Emplacement models on the ridge that overlooks the Thames, there were created using two cylinders, one to make the turret and the other for the turret housing, also for the concrete emplacement was a sphere that I squashed down to make a semi circular shape.
Below is a picture of the bridges and the guns.


I then added some basic buildings that are inside the Fort using blocks and pyramids, below is the picture of these buildings.

I then added the back gatehouse to the fort, this was made using a large block and deleting the centre to create a gangway, I then added a pyramid for the roof, I added the same brick material used on the walls, for the roof I added a roof tile material I found on google, I also added the gate in, the material for the gate was cut from a picture I took at the fort using Photoshop.
Here is a picture of the back gatehouse and the gate.


I am very happy with my model, here is a final render of all the materials applied.

No comments:
Post a Comment